前言
相信我,肥宅我看了很多網站上教學,都是老舊的廢文,甚至如果照做就有可能造成出錯的問題。還有很多文章也沒有詳細講解該如何配置,關於 Linux 中的 GDB 配置在 VScode 的文章少之又少,錯誤百出。因此肥宅在這教導各位正確地在 Linux 環境下從安裝 VScode 到配置環境變量與 GDB 調試。
肥宅的 Linux 發行版資訊
肥宅使用的發行版是 ArchLinux,圖形界面是 KDE Plasma。
系統資訊
下載安裝 VScode
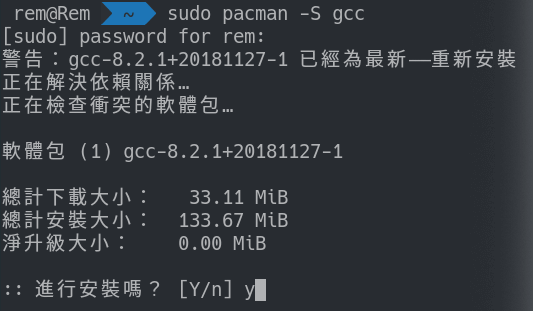
在 Konsole 輸入下載指令
註:因爲圖形界面的使用者一定是一般使用者,不可能是超級使用者 ,所以在輸 pacman 前面要加上 sudo。
安裝 VScode
輸入 y 並按下 Enter。
下載 GCC GDB
註:肥宅是在 Windows OS 用習慣了 MinGW-w64,但在 Linux 這樣配置並不是很好的選擇,如果你使用 GCC 或 Clang 會跟 Linux 兼容性高。MinGW-w64 軟件包包含 gcc g++ GDB…等內容及 API。
在這裡肥宅使用 GCC 與 GDB
在 Konsole 輸入下載指令
GCC
安裝 GCC
輸入 y 並按下 Enter。
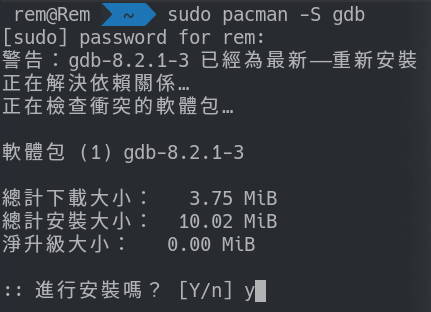
GDB
安裝 GDB
輸入 y 並按下 Enter。
補充:
註:有些小白可能不懂,在此肥宅附上 WIKI 連結
什麼?!你還是不懂?
你不會 GOOGLE 一下嗎
安裝 VScode 插件
安裝自己使用的語言並 Reload
在插件搜尋處搜尋自己要的語言,像肥宅我是用繁體中文 ,所以只要在搜尋處打上 traditional 就會出現安裝插件,按下 Install,並等它裝好 Reload就會切換到自己想要的語言界面,如果你想裝的是簡體中文 ,可以輸入 simplified,其實你只要輸入 Chinese 的 ch 基本繁體簡體都會顯示出來。
語言插件
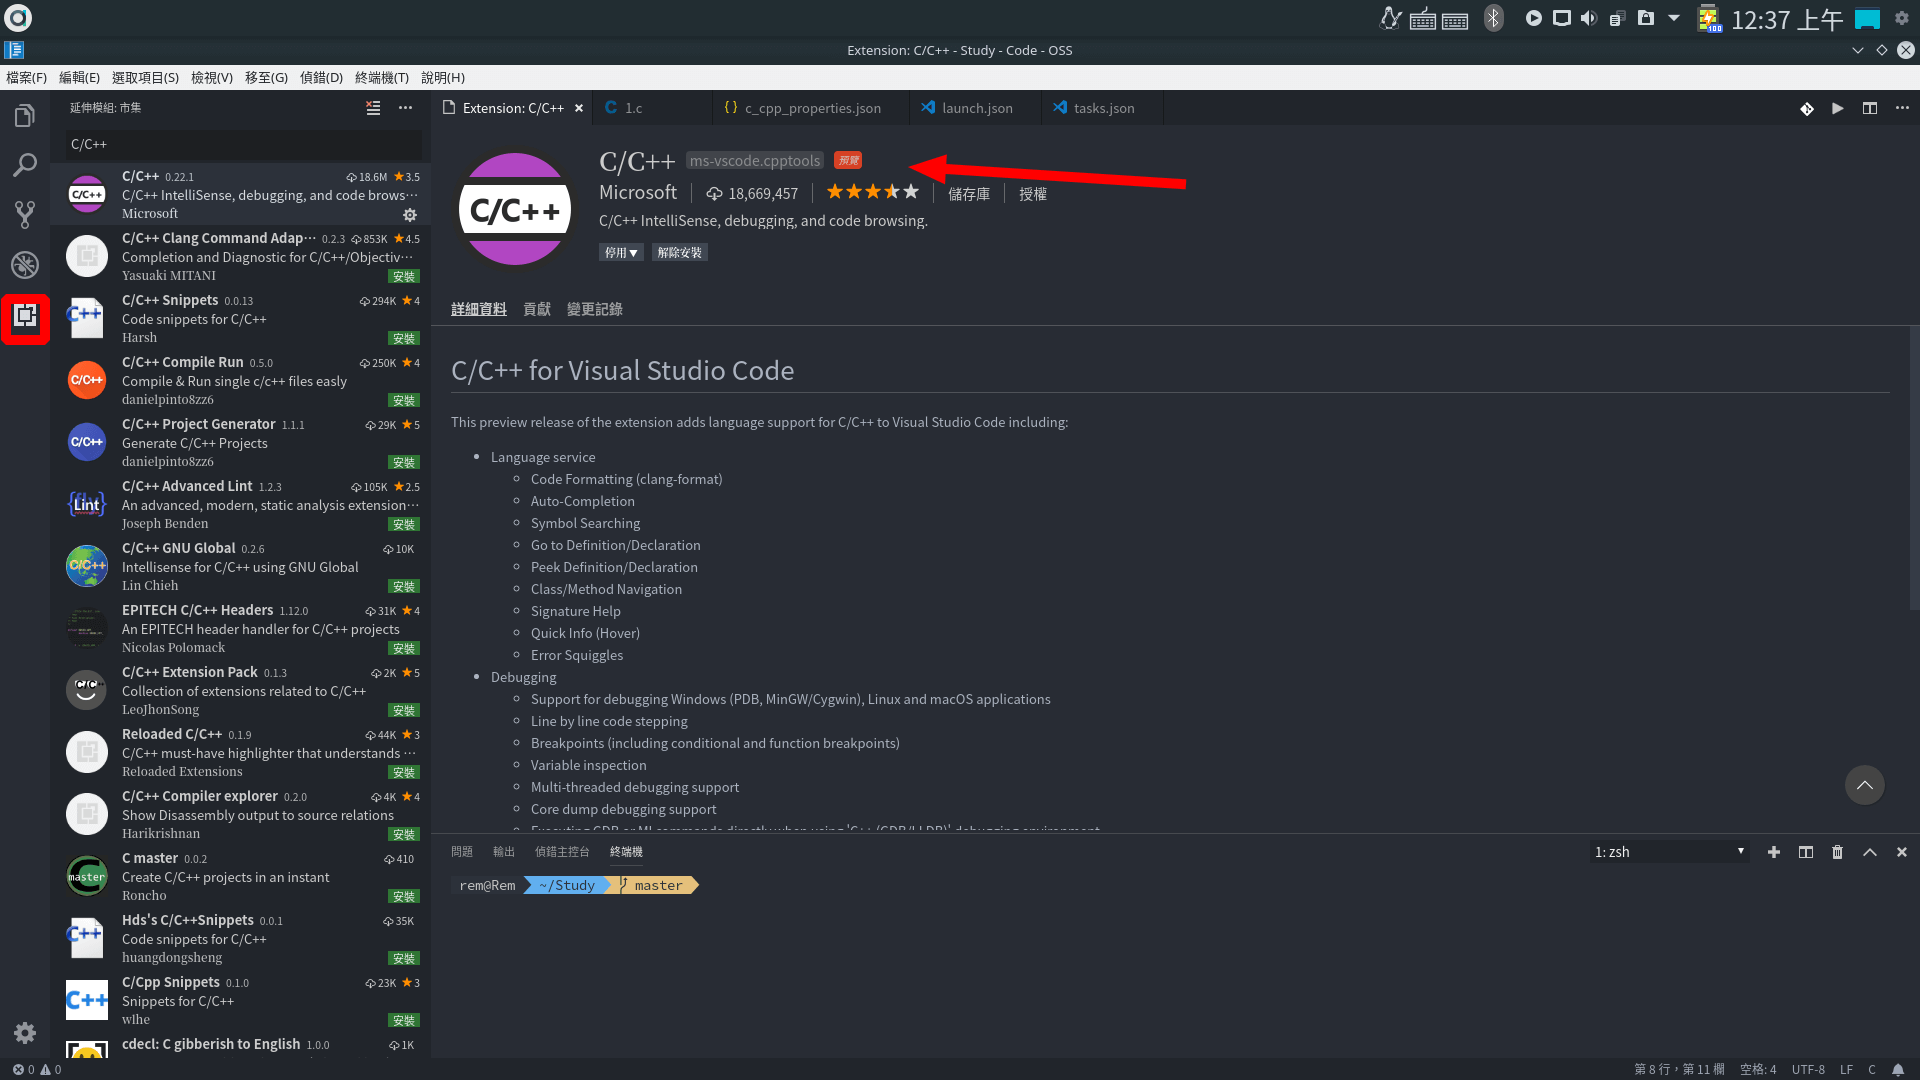
安裝 C/C++ 插件
搜尋 C/C++ 並安裝
C/C++ 插件
其餘插件推薦請參考 Visual Studio Code 推薦使用插件
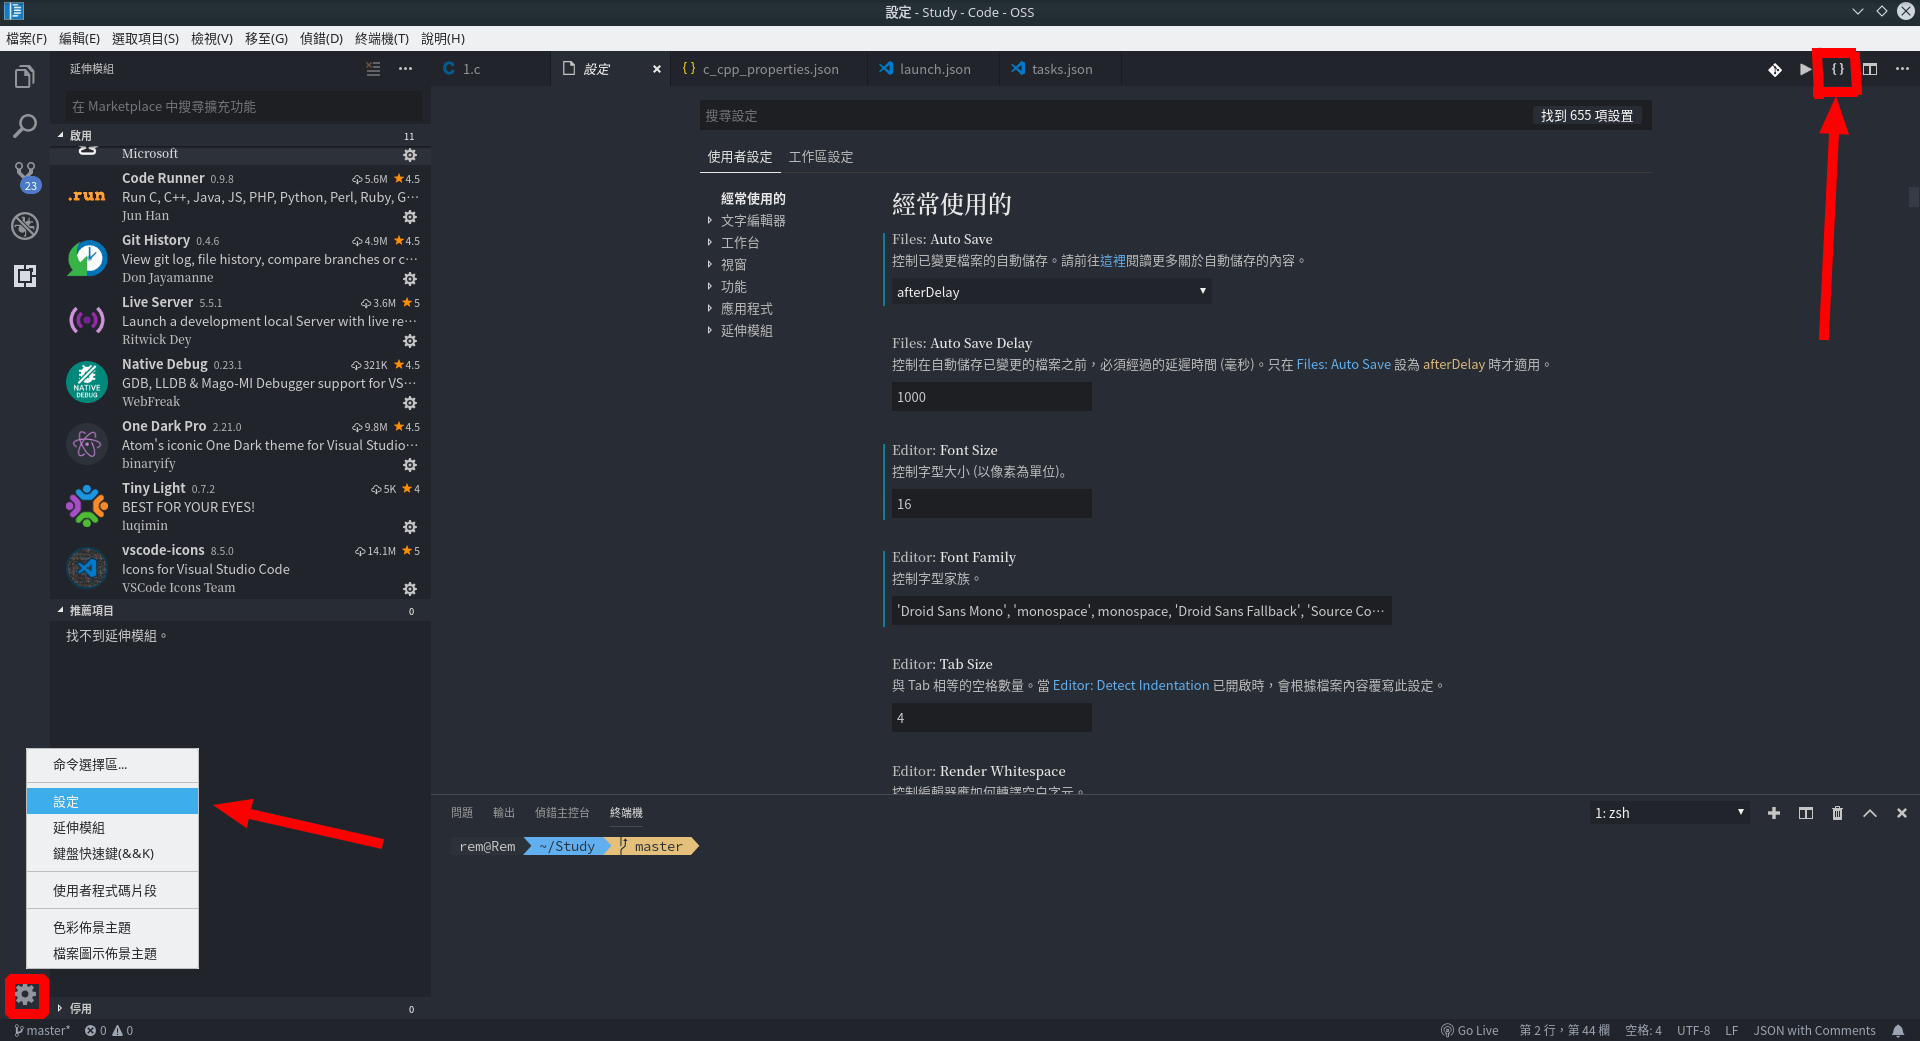
VScode 一些設定參考
點擊左下角滾輪中的設定,再點擊右上角的 {},可進入 settings.json。
設定文件
settings.json
 1
 2
 3
 4
 5
 6
 7
 8
 9
10
11
12
13
14
15
16
{
    "workbench.colorTheme": "One Dark Pro",
    "workbench.iconTheme": "vscode-icons",
    "terminal.integrated.fontFamily": "Source Code Pro",
    "code-runner.runInTerminal": true,
    "code-runner.saveFileBeforeRun": true,
    "code-runner.clearPreviousOutput": true,
    "typescript.locale": "zh-TW",
    "code-runner.fileDirectoryAsCwd": true,
    "editor.fontLigatures": true,
    "editor.fontFamily": "'Droid Sans Mono', 'monospace', monospace, 'Droid Sans Fallback', 'Source Code Pro'",
    "terminal.integrated.rendererType": "canvas",
    "files.autoSave": "afterDelay",
    "editor.fontSize": 16,
    "C_Cpp.default.intelliSenseMode": "clang-x64"
}
註:肥宅有裝 code-runer 插件,所以設定中有這個 code-runner。這裡不需要各位去複製貼上,只是給大家參考肥宅用了那些主題與插件。像肥宅目前使用 One Dark Pro 佈置主題。
注意:第 5 行的設定很重要,因為當你裝完 code-runner 時預設是不能在終端機輸入,所以才將 code-runner.runInTerminal 參數設為 true
配置 GDB 調試
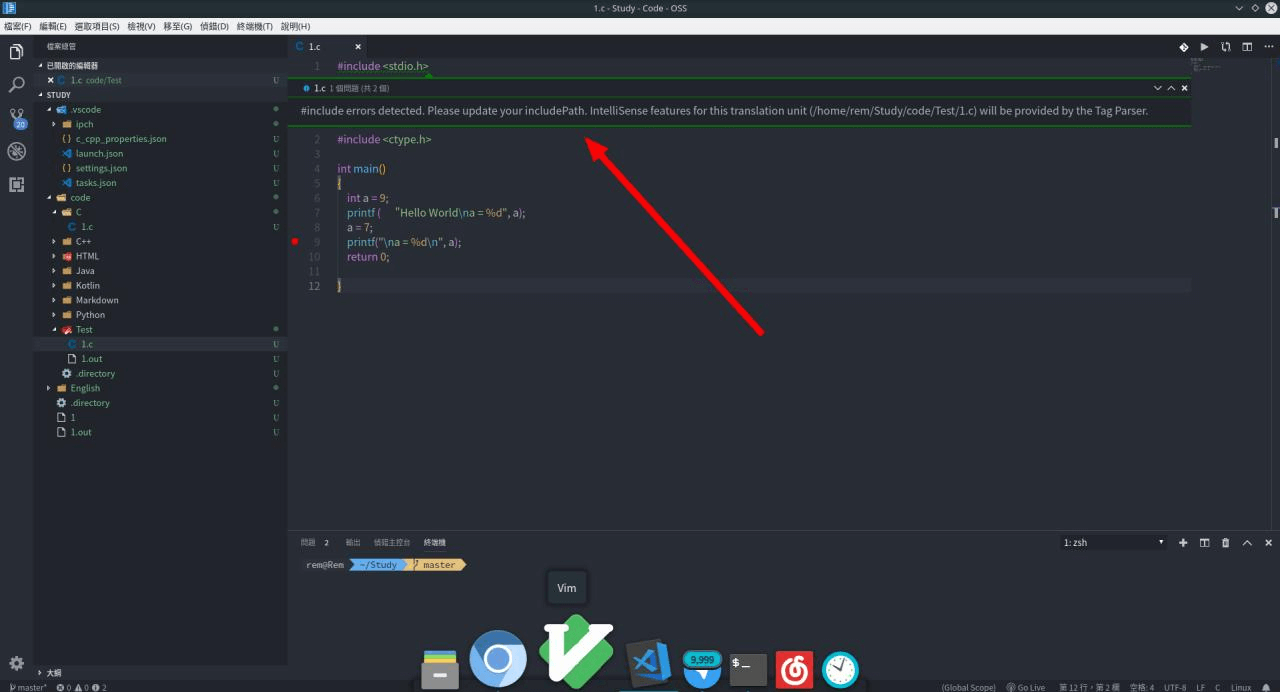
這時你的電腦已配置了 gcc g++ 的環境變數,但你並還沒將其 IDE 完全配好,如果沒配好會出現一些問題,像肥宅在寫 C 敲上 #include <stdio.h> 時底部會出現綠色的波浪線 ,因爲沒將頭文件 *.h 都載入,雖然不影響編譯執行,但總會覺得很礙眼,感覺有瑕疵,在這裡肥宅一次幫各位解決。
註:下圖為綠色波浪底線示意圖
綠色波浪底線
讓我們開始配置吧~
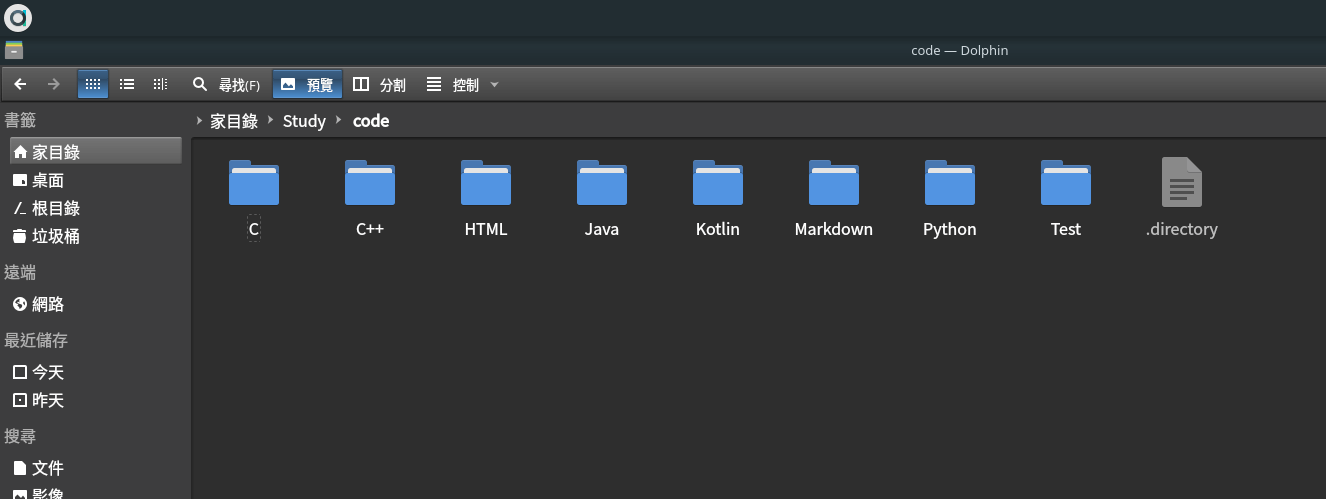
註:建議各位將所有代碼集中在一個資料夾方便管理,並有序分類。
Code 分類
註:這裡使用的是 Dolphin 來檢視檔案,類似 Windows OS 的檔案總管,這裡就不介紹這個。
顯示隱藏的 file 和 directory
註:資料夾名或檔案名開頭是 . 的話會隱藏的,e.g. .vscode .git ,必須開啟可以顯示的設定才能看到。
請於代碼根目錄 (也就是你使用 VScode 打開的資料夾)先將隱藏的檔案 可以顯示,這裡因爲是肥宅先配置好的所以才會看到 .vscode,請在這新建個資料夾,資料夾名叫 .vscode,並分別新建四個文件,分別是
註:像肥宅在 VScode 開啟的資料夾是 Study,所以肥宅在 Study 這個資料夾目錄中新增名為 .vscode 的資料夾,並進入此資料夾新建四個檔案
settings.json
c_cpp_properties.json
launch.json
task.json
接著分別填入以下內容
settings.json
 1
 2
 3
 4
 5
 6
 7
 8
 9
10
11
12
13
14
15
16
{
    "files.defaultLanguage": "cpp", // ctrl+N新建文件后默认的语言
    "editor.formatOnType": true, // 输入时就进行格式化,默认触发字符较少,分号可以触发
    "editor.formatOnSave": true, // 每次存檔時,自動執行自動排版功能
    "editor.snippetSuggestions": "top", // snippets代码优先显示补全
    "code-runner.runInTerminal": true, // 设置成false会在“输出”中输出,无法输入
    "code-runner.executorMap": {
        "c": "cd $dir && gcc $fileName -o $fileNameWithoutExt && $dir$fileNameWithoutExt.out",
        "cpp": "cd $dir && g++ $fileName -o $fileNameWithoutExt && $dir$fileNameWithoutExt.out"
    }, // 设置code runner的命令行
    "code-runner.saveFileBeforeRun": true, // run code前保存
    "code-runner.preserveFocus": true, // 若为false,run code后光标会聚焦到终端上。如果需要频繁输入数据可设为false
    "code-runner.clearPreviousOutput": false, // 每次run code前清空属于code runner的终端消息
    "C_Cpp.clang_format_sortIncludes": true, // 格式化时调整include的顺序(按字母排序)
    "C_Cpp.intelliSenseEngine": "Default", // 可以为Default或Tag Parser,后者较老,功能较简单。具体差别参考cpptools扩展文档
}
註:在 Linux 中輸出檔的副檔名是 *.out,有別於 Windows 的 *.exe
注意:第八行與第九行的是 code-runner 插件的編譯執行命令行,因為是在 Linux 下編譯執行,所以肥宅在後面 fileNameWithoutExt 變數後面從 .exe 改成 .out,這樣在使用 code-runner 插件時幫你自動生成的輸出檔副檔名是 *.out
c_cpp_properties.json
 1
 2
 3
 4
 5
 6
 7
 8
 9
10
11
12
13
14
15
16
17
18
19
20
21
22
23
24
25
26
27
28
29
30
31
32
33
{
    "configurations": [
        {
            "name": "Linux",
            "includePath": [
                "${workspaceFolder}/**",
                "/usr/include",
                "/lib64/gcc/x86_64-pc-linux-gnu/8.2.1/include/"
            ],
            "cStandard": "c11",
            "cppStandard": "c++17",
            "intelliSenseMode": "gcc-x64",
            "defines": [
                "_DEBUG",
                "UNICODE",
                "__GNUC__=7",
                "__cdecl=__attribute__((__cdecl__))"
            ],
            "browse": {
                "path": [
                    "${workspaceFolder}",
                    "/usr/include",
                    "/lib64/gcc/x86_64-pc-linux-gnu/8.2.1/include/",
                    "/lib64/gcc/x86_64-pc-linux-gnu/8.2.1/include-fixed/",
                    "/lib64/gcc/x86_64-pc-linux-gnu/8.2.1/install-tools/include/"
                ],
                "limitSymbolsToIncludedHeaders": true,
                "databaseFilename": ""
            }
        }
    ],
    "version": 4
}
註:肥宅之前就是這裡沒配置好(第 5 行的 "includePath")所以才會在 #include <stdio.h> 這行底部出現綠色波浪
注意:肥宅 GCC 的版本是 8.2.1,所以如果你的版本改跟我不一樣請修改成你的當前版本,這裡最重要的是路徑不能有錯。也許你的路徑可能跟我不一樣,這些都可以在 root 根目錄中找到,請自行尋找與修改。
launch.json
 1
 2
 3
 4
 5
 6
 7
 8
 9
10
11
12
13
14
15
16
17
18
19
20
21
22
23
24
25
26
27
28
29
30
31
32
33
34
35
36
37
38
39
40
41
42
43
44
45
46
47
48
49
50
51
52
53
54
55
56
57
58
59
60
61
62
63
64
65
66
67
68
69
70
71
72
73
74
75
76
77
78
79
80
81
82
83
84
85
86
87
88
{
    // 使用 IntelliSense 以得知可用的屬性。
    // 暫留以檢視現有屬性的描述。
    // 如需詳細資訊,請瀏覽: https://go.microsoft.com/fwlink/?linkid=830387
    "version": "0.2.0",
    "configurations": [
        {
            "name": "Run C",
            "type": "cppdbg",
            "request": "launch",
            "program": "${workspaceFolder}/${fileBasenameNoExtension}.out",
            "args": [],
            "stopAtEntry": false,
            "cwd": "${workspaceFolder}",
            "environment": [],
            "externalConsole": false,
            "MIMode": "gdb",
            "setupCommands": [
                {
                    "description": "Enable pretty-printing for gdb",
                    "text": "-enable-pretty-printing",
                    "ignoreFailures": false
                }
            ],
            "preLaunchTask": "build & run file C"
        },
        {
            "name": "Run C++",
            "type": "cppdbg",
            "request": "launch",
            "program": "${workspaceFolder}/${fileBasenameNoExtension}.out",
            "args": [],
            "stopAtEntry": false,
            "cwd": "${workspaceFolder}",
            "environment": [],
            "externalConsole": false,
            "MIMode": "gdb",
            "setupCommands": [
                {
                    "description": "Enable pretty-printing for gdb",
                    "text": "-enable-pretty-printing",
                    "ignoreFailures": false
                }
            ],
            "preLaunchTask": "build & run file C++"
        },
        {
            "name": "Debug C",
            "type": "cppdbg",
            "request": "launch",
            "program": "${workspaceFolder}/${fileBasenameNoExtension}.out",
            "args": [],
            "stopAtEntry": false,
            "cwd": "${workspaceFolder}",
            "environment": [],
            "externalConsole": false,
            "MIMode": "gdb",
            "setupCommands": [
                {
                    "description": "Enable pretty-printing for gdb",
                    "text": "-enable-pretty-printing",
                    "ignoreFailures": false
                }
            ],
            "preLaunchTask": "build & debug file C"
        },
        {
            "name": "Debug C++",
            "type": "cppdbg",
            "request": "launch",
            "program": "${workspaceFolder}/${fileBasenameNoExtension}.out",
            "args": [],
            "stopAtEntry": false,
            "cwd": "${workspaceFolder}",
            "environment": [],
            "externalConsole": false,
            "MIMode": "gdb",
            "setupCommands": [
                {
                    "description": "Enable pretty-printing for gdb",
                    "text": "-enable-pretty-printing",
                    "ignoreFailures": false
                }
            ],
            "preLaunchTask": "build & debug file C++"
        }
    ]
}
註:在分 C/C++ 的配置時可以分開,一個是 gcc 一個是 g++,然而有些人直接全部都是用 g++ 編譯,這樣也可以,只是不能使用 gcc 去編譯 C++。由於肥宅有強迫症,所以分成四個部份。
**注意:這裡肥宅分了四個類型,分別是 Run C Run C++ Debug C Debug C++,
其中每一個 "program" (進行調試的程序路徑)參數都是
"${workspaceFolder}/${fileBasenameNoExtension}.out",
"preLaunchTask" 的值則是對應到 task.json 的 "label",如果兩者對應的名稱出錯在調試時會出現找不到對應名稱的錯誤訊息,要你開啟 launch.json 重新設定。**
tasks.json
 1
 2
 3
 4
 5
 6
 7
 8
 9
10
11
12
13
14
15
16
17
18
19
20
21
22
23
24
25
26
27
28
29
30
31
32
33
34
35
36
37
38
39
40
41
42
43
44
45
46
47
48
49
50
51
52
53
54
55
56
57
58
59
60
61
62
63
{
    "version": "2.0.0",
    "tasks": [
        {
            "label": "build & debug file C",
            "type": "shell",
            "command": "gcc",
            "args": [
                "-g",
                "${file}",
                "-o",
                "${fileBasenameNoExtension}.out"
            ],
            "group": {
                "kind": "build",
                "isDefault": true
            }
        },
        {
            "label": "build & debug file C++",
            "type": "shell",
            "command": "g++",
            "args": [
                "-g",
                "${file}",
                "-o",
                "${fileBasenameNoExtension}.out"
            ],
            "group": {
                "kind": "build",
                "isDefault": true
            }
        },
        {
            "label": "build & run file C",
            "type": "shell",
            "command": "gcc",
            "args": [
                "${file}",
                "-o",
                "${fileBasenameNoExtension}.out"
            ],
            "group": {
                "kind": "build",
                "isDefault": true
            }
        },
        {
            "label": "build & run file C++",
            "type": "shell",
            "command": "g++",
            "args": [
                "${file}",
                "-o",
                "${fileBasenameNoExtension}.out"
            ],
            "group": {
                "kind": "build",
                "isDefault": true
            }
        }
    ]
}
註:-g 是調試的意思,-o 是輸出的意思。
注意:每個 "args" 參數中的 "${fileBasenameNoExtension}.out" 要特別注意尾端改成.out。
調試畫面
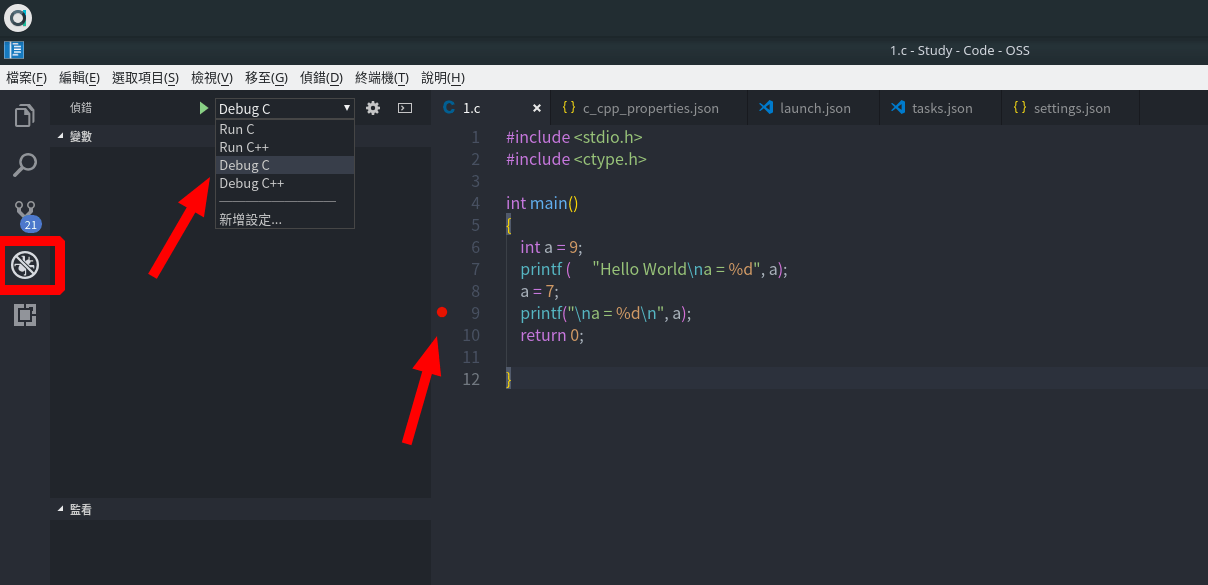
配置完後,你可以在調試欄看到 Run C Run C++ Debug C Debug C++ 選項。
肥宅現在要調試 1.c 這個檔案,可以在代碼中設置斷點 ,並選擇 Debug C。
設置斷點
註:調試快捷鍵 F5
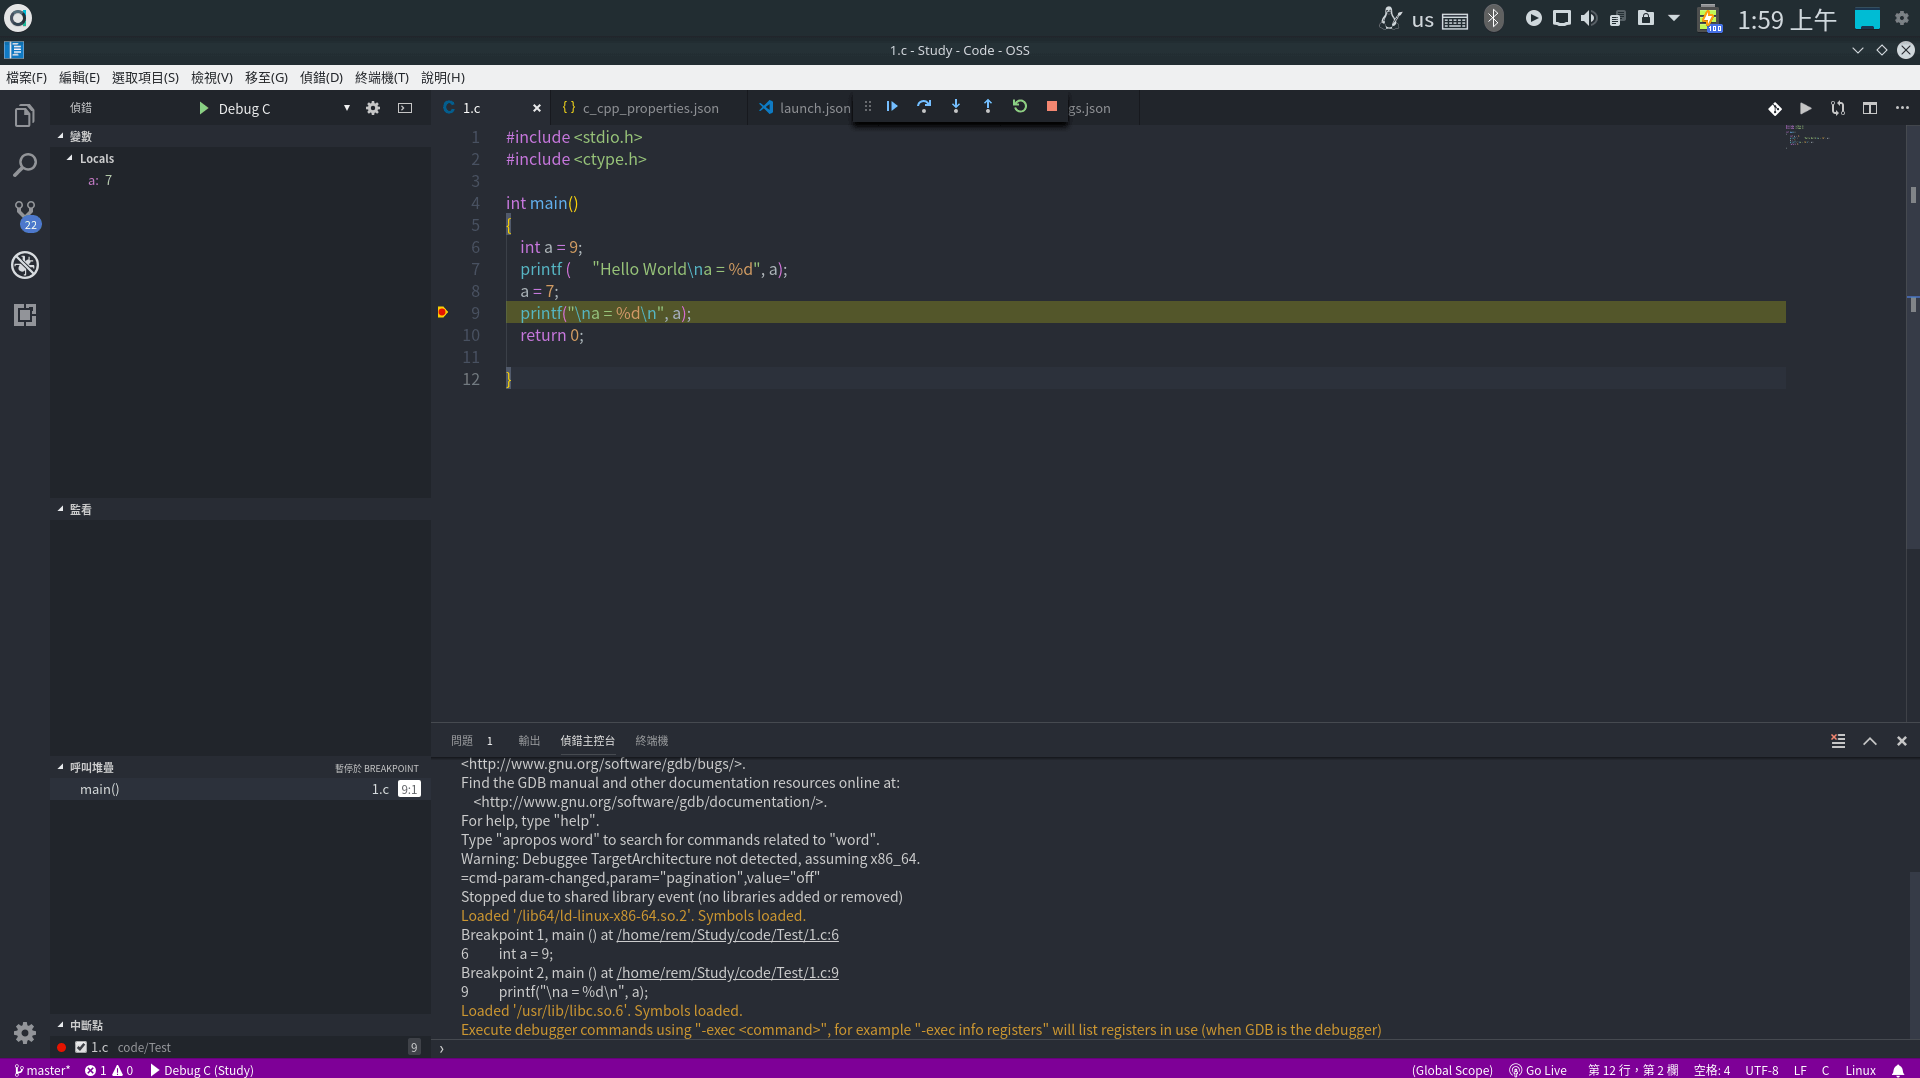
調試
左側可以看到變數的值
註:肥宅已在 launch.json 中設定 "externalConsole": false,因爲這個設定的意思是使格外彈出個 Konsole,這功能只能在 Windows OS 中改成 true
純手工編譯執行
假設有個檔名叫 1,副檔名可以是 *.c 或 *.cpp
C
編譯標準 C99
1
gcc -std= c99 1.c -o 1.out
執行
C++
編譯標準 C++11
1
g++ -std= c++11 1.cpp -o 1.out
執行
如果有引入其他自定義的標頭檔之實現檔
編譯時加入參數
e.g. 我有 main.c 且引入自定義的 Circle.h 標頭檔,並且將 Circle.h 標頭檔的實現部份寫在 Circle.cpp
編譯
1
gcc -std= c99 main.c Circle.cpp -o main.out
執行
 Rem Blog